Category: Automation

  • Automating Task Creation in SharePoint Using Power Automate

    If you’re looking to streamline task management in SharePoint, setting up an automated flow can save a lot of manual work. In this guide, we’ll walk through a simple Power Automate flow that creates a SharePoint list item when a new task is added. Let’s dive in!

    Setting Up the Flow

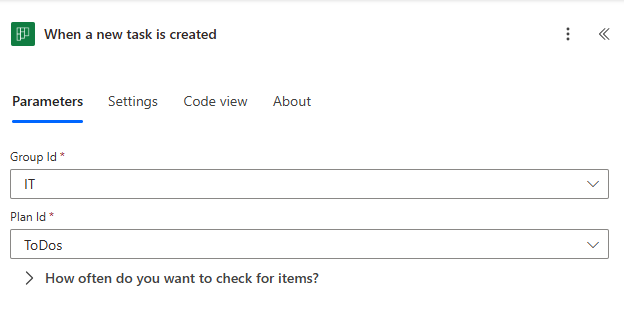
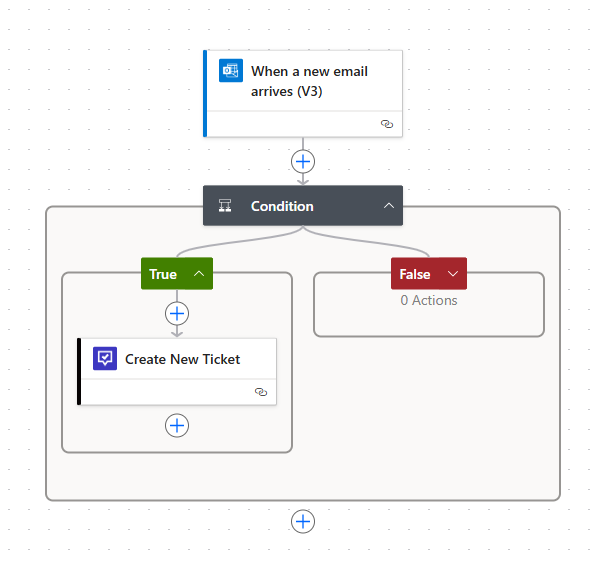
    We start with a basic trigger: When a new task is created. This trigger watches for tasks in a specific group and plan. Once a new task is added, the flow kicks in.

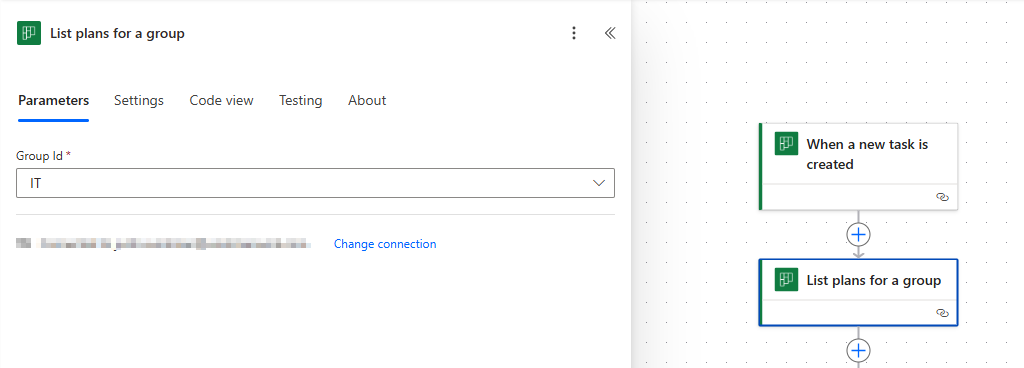
    Next, we list the plans for the same group selected in the trigger. The reason? Instead of working with an ID, we want the actual plan name when we create the SharePoint list item.

    Filtering the Plans

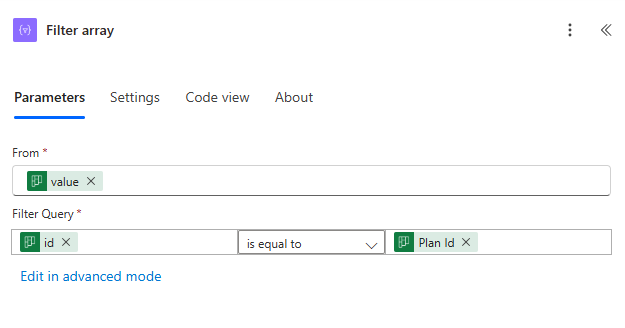
    Since multiple plans can be associated with a group, we need to filter the list down to the specific plan related to the task. This ensures that only the relevant plan is used in the SharePoint entry.

    Looping Through Assignments

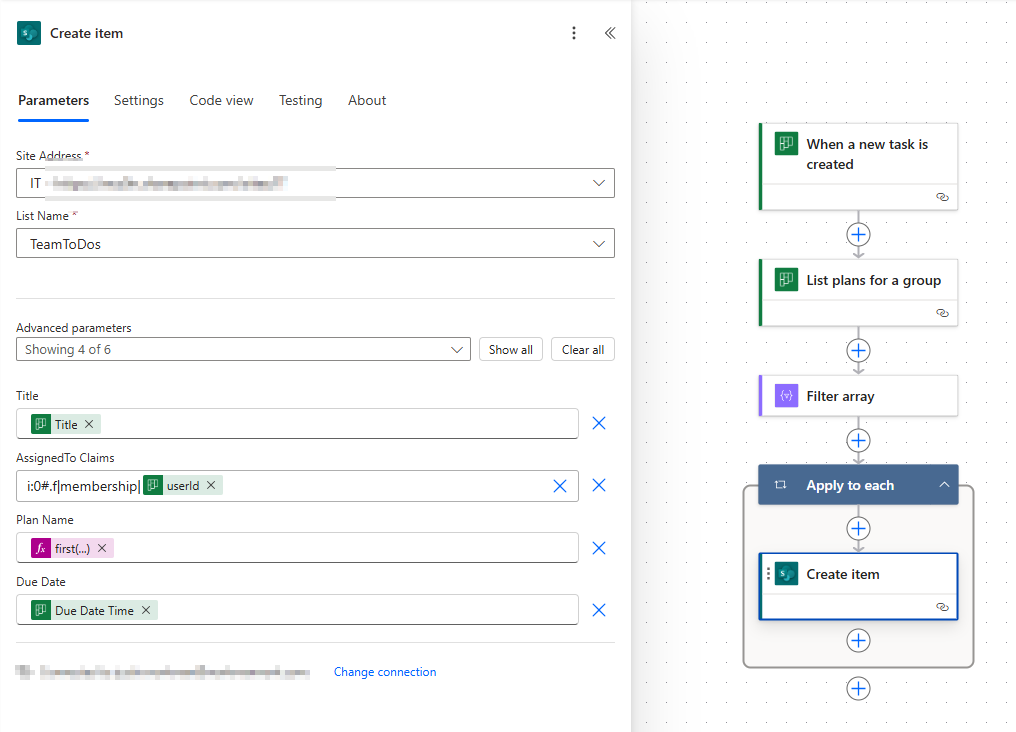
    When a task is created, it might have multiple assignees. To handle this, we use a loop to iterate through each assigned user. This step ensures that all assignees are accounted for when creating the SharePoint list item.

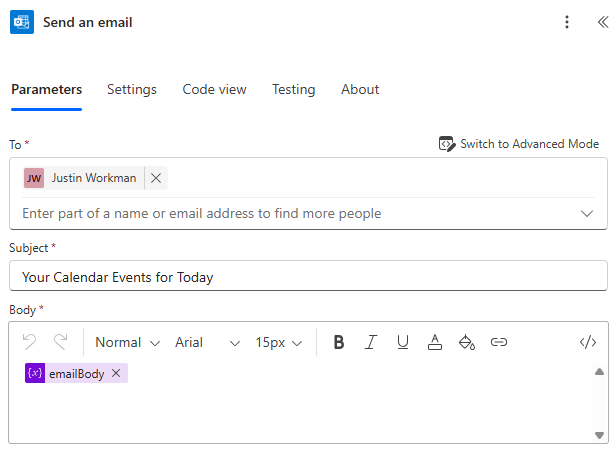
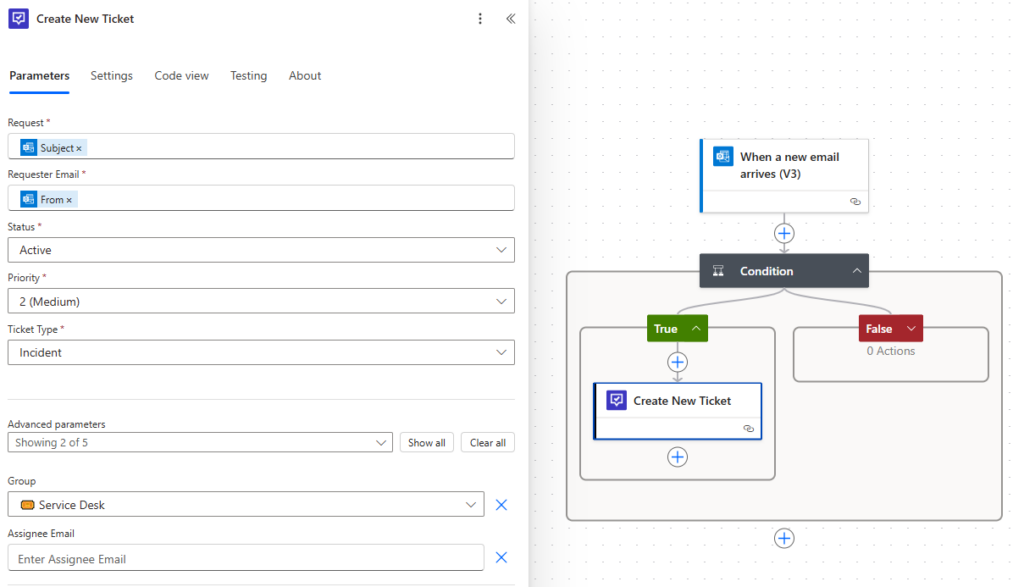
    Creating the SharePoint List Item

    Now, we’re ready to create the SharePoint list entry. Here’s what we include:

    • Title – The title of the task that triggered the flow.
    • Assigned To – This uses a specific claims format: i:0#.f|membership|<userId>
    • Plan Name – Extracted from the filtered plan list, ensuring we use the actual name instead of an ID.
    • Due Date – Passed directly from the task data.
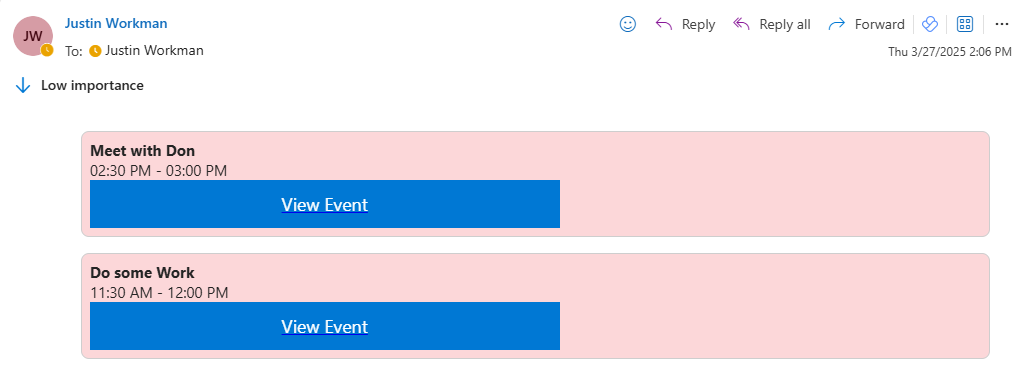
    Testing the Flow

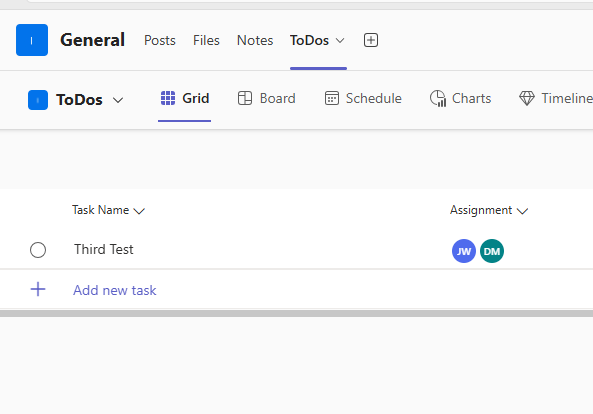
    To confirm everything works, we add a new task to our board, set a due date, and assign two users.

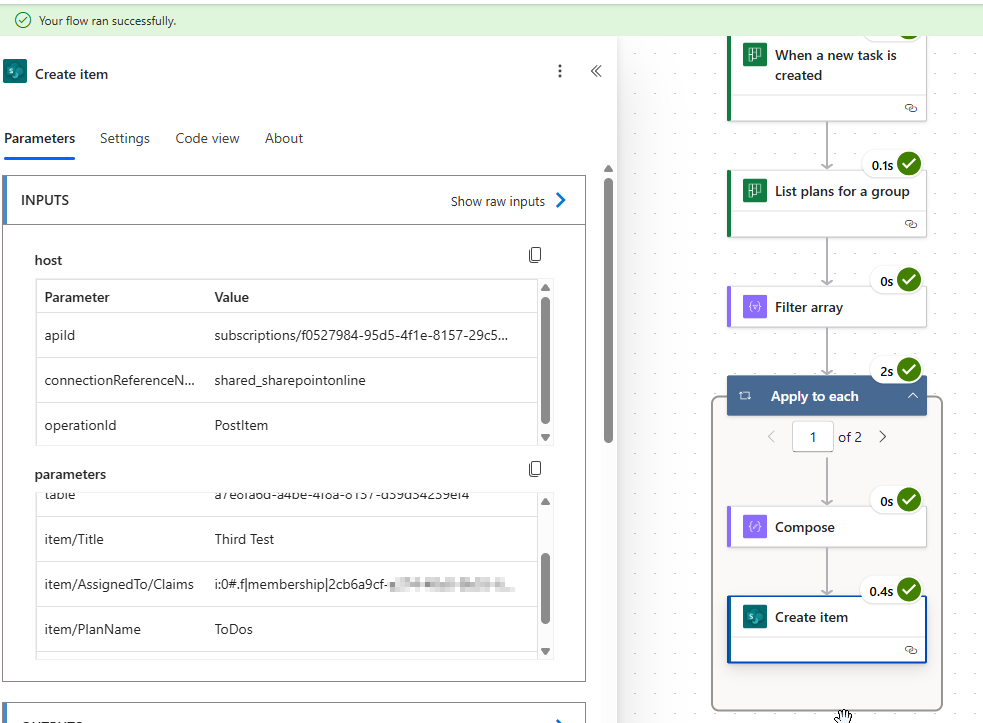
    Once the task is created, we check the flow execution, and sure enough, it runs successfully.

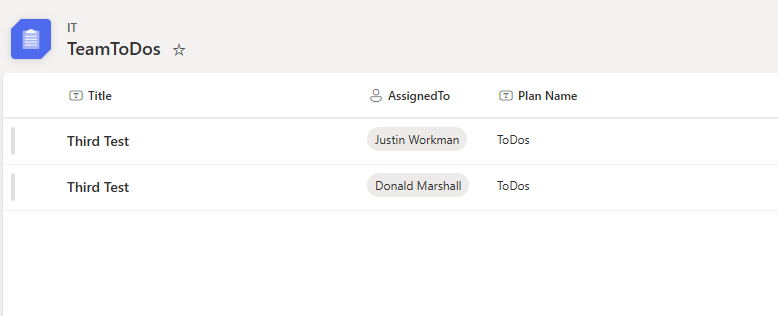
    A quick refresh of the SharePoint list shows that our task details—including assignees, plan name, and due date—are all captured correctly.

    Wrapping Up

    With this automation in place, managing tasks in SharePoint becomes much easier. Instead of manually creating list items, Power Automate ensures everything is logged efficiently as soon as a task is created. Try it out and see how much time it saves your team!

    Check out my video to see the whole flow in action!

  • Automate Your Daily Schedule Summary with Power Automate

    Staying on top of your daily schedule is crucial! What if you could receive a single, neatly formatted email summarizing all your events for the day? In this post, I’ll walk you through how I set up a Power Automate flow to do just that!

    Why This Flow?

    The purpose of this automation is simple:

    • Gather all events from your calendar for the day.
    • Format them into an HTML email.
    • Send a single, easy-to-read email summarizing the day’s schedule.

    Building the Flow

    1. Initialize the Email Body

    The first step in the flow is to create a structured email body. This is done using HTML and CSS to ensure proper formatting. We open the <html> and <div> tags to prepare the email content.

    2. Retrieve Events for the Day

    Using an OData query, the flow fetches calendar events for the current day. This query pulls all events between UTC midnight and UTC end of day, ensuring that only today’s events are included.

    3. Format Each Event

    For each event retrieved, we:

    • Create an HTML <div> for the event details.
    • Set a background color (pink for busy, green for free events).
    • Include key details: event subject, start and end time, event body, and a clickable link.

    4. Compile and Send the Email

    Once all events are processed, the HTML email is finalized by closing the tags and ensuring the content is properly structured. If there are events, the email is sent; otherwise, the flow does nothing.

    The Final Result

    After testing the flow, we see that it successfully generates a well-structured email containing all scheduled events for the day. The email arrives in Outlook, showing only today’s events with the correct formatting and color coding.

    Watch the Full Walkthrough

    Check out my video where I demonstrate the setup, execution, and results of this automation in real-time.

    If you’re looking to streamline your daily schedule notifications, give this Power Automate flow a try! Let me know in the comments if you have any questions or need help setting it up.

  • Automating Email-to-Ticket Creation: A Small Change with a Big Impact

    In today’s customer-centric business world, speed and efficiency in handling service requests are more important than ever. Customers expect quick resolutions, and IT teams are under pressure to meet those expectations without getting buried in manual work. One simple yet powerful way to streamline service management is by automating ticket creation from emails.

    Why Email-to-Ticket Automation Matters

    Tikit already allow ticket creation from a shared mailbox, but what about direct emails to individual agents? Without automation, these emails can get lost in inboxes, delaying responses and increasing manual effort. By setting up a workflow where incoming emails automatically generate tickets, IT teams can ensure that no request falls through the cracks.

    How It Works

    Let’s say an agent receives an email requesting support. Instead of manually logging into Tikit and creating a ticket, an automation tool like Power Automate can intercept the email and trigger a ticket creation process. This automation can:

    • Standardize request intake by applying predefined ticket categories and priorities.
    • Improve response time by routing tickets to the right teams automatically.
    • Enhance visibility by ensuring all requests are tracked in the ITSM system.

    Aligning with Customer Experience Trends

    Businesses today are focusing on digital transformation to improve customer experience, and automation is a key part of that shift. Customers and employees alike expect seamless interactions when reporting issues. By implementing email-to-ticket automation, IT teams can reduce response times, eliminate bottlenecks, and improve overall service quality.

    Getting Started

    The best part? This type of automation doesn’t have to be difficult. Start with a simple trigger-action workflow:

    1. Trigger: New email received from a specified address or containing certain keywords.
    2. Action: Create a ticket in Tikit with relevant details extracted from the email.

    Once this basic setup is in place, you can expand it with additional automation, such as assigning tickets based on content or escalating high-priority requests.

    Small Automations, Big Results

    ITSM automation isn’t just about cutting down on manual work—it’s about creating a smoother, more efficient service experience. Whether for internal IT teams or customer support, email-to-ticket automation is a small change that delivers a big impact, aligning IT processes with the expectations of today’s fast-moving, customer-focused world.

    If you’re looking for a new Service Desk tool that integrates seamlessly into Microsoft Teams, you should definitely check out Tikit! You can get a 14-Day FREE trial and even get help getting it set up!

  • Why Approvals Matter in Ticket Lifecycles

    When designing a ticket lifecycle, one of the first questions to ask is: Should an approval step come first? In many cases, the answer is yes.

    The Role of Approvals in Automation
    From a business perspective, approvals can be necessary right away—think about onboarding a new user or processing a critical request. But beyond that, approvals serve a tactical function in automation-heavy workflows.

    In my approach, the approval step gates the rest of the lifecycle. That means no automation runs until someone has reviewed and validated the request. This is a good practice because:

    ✅ It prevents automated actions from being triggered prematurely.
    ✅ It ensures that human oversight is part of the process when needed.
    ✅ It helps catch errors before automation takes over.

    Of course, you can automate everything right from the start. But sometimes, it’s worth having a quick human review before automation kicks in.

    If your workflow involves taking action on behalf of a user, consider adding an approval step—it could save you from unexpected issues down the road.

    Check out this recent webinar I did on Power Automate where approval in Tikit was the first step in a New User Onboarding lifecycle!